It's official! Today is Opening Day for MLB teams all over the country! So it's time the Cool Dads Cook Crew provides you with some delicious tailgate recipes!
I think it is safe to say that Doug in the Arkansas Test Kitchen LOVES to grill (as a matter of fact, he bought his grill a Valentine's Day present), and he is always looking for new and fascinating things to cook and wrap in bacon. Not too long ago, both Test Kichens collaborated on a recipe that involves all of Doug's favorite things: meat, and bacon. Folks, we give you Bacon Wrapped Ribs, or like Doug calls them Ribs in a Blanket.
Looking for further proof Doug is a grilling fanatic? The day he made this recipe; he went outside to start the fire, but by the time the coal was ready to be placed in the smoker, it was raining pretty hard. Did that deter Doug? NO! He stood out in the rain for 2+ hours making these great ribs.
Bacon Wrapped Ribs/Ribs in a Blanket
3 lbs. of boneless country style ribs
Rib rub to taste
1 1/2 lbs. bacon
Toothpicks
Barbecue Sauce
Directions:
1. Cut off any additional fat on the ribs(any fat that is visible and easy to cut off). Remember you want a little fat to keep the meat juicy.
2. Liberally season meat with rib rub.
3. Wrap each rib with bacon. Some ribs may require more than 1 piece of bacon. Use a toothpick to keep the bacon wrapped on the meat during the cooking process. Be careful! You want to make sure you can find all the toothpicks when the ribs are done cooking. No one wants to have to perform the Heimlich maneuver over toothpicks.
4. Let meat sit out for 2 hours loosely covered.
5. Start your fire, I love using a fire chimney and fire starter bricks. These can be found on Amazon.com . The biggest advantage to using a fire chimney is you're not using lighter fluid- which means your food won't taste like it later.
6. Remember to always brush and oil your grill grate.
7. Set your grill up for indirect grilling
8. Place a piece of fruit wood on the fire (always use fruit wood for pork and chicken, it just tastes better).
9. Once the smoker or grill starts smoking, place your meat on the grill.
10. Allow your meat to smoke on the grill until it reaches 200 degrees (be patient, or as my parents always taught me, patience is a virtue)
11. Once the meat reaches 200 degrees, take a basting brush and barbecue sauce and baste the meat placing it close to the fire to allow the sauce to caramelize, but not burn.
12. You will only want your meat on the fire about 1 minute per side. Anything more could cause the sauce to become burnt.
13. Bring the ribs into the house, cover with aluminum foil and allow to rest for 15 - 30 minutes (trust us: patience is a virtue- you will love this).
14. Remove the toothpicks and enjoy some great meat.
We hope you love our first tailgate recipe as much as we enjoyed sharing it with you!
Play Ball!
The Cool Dads Crew
Monday, March 31, 2014
Friday, March 28, 2014
Friday FUNdamentals: Paninis
Ever find yourself standing in front of an open refrigerator; staring at a random assortment of items and wishing they'd magically turn themselves into an edible, creative dinner?
Yeah, us either.
Just kidding. This happens more often than we'd care to admit in the Wisconsin Test Kitchen. Some nights it just seems easier to order a pizza or some sesame chicken and call it a meal. But a few weeks ago, we discovered something glorious. Paninis are Sawyer's newest favorite food. Come to find out, she'll eat just about anything if we grill it between two slices of bread. Paninis have been an excellent way for us to get protein (nitrate free lunch meat and cheese) and vegetables (ripe avocado, peppers, lettuce) into her diet quasi-sneakily.
Paninis are also an easy meal to throw together when we find a random assortment of food in the fridge and half a loaf of THE bread. This past week we had romaine lettuce, tomatoes, avocado and leftover bacon. Bam- grilled BLTs. We've also made Pizza Paninis (pizza sauce, mozzarella cheese and turkey pepperoni), and a savory adult Panini made with crumbly goat cheese and fig spread. We've also been known to grill up a Fat Elvis Panini: peanut butter, banana slices and bacon. Mmm.
This begs the question- why is a Panini so much better than a plain old grilled cheese out of a frying pan? First, a Panini press is weighted; so it presses down your sandwich which helps to evenly grill the bread- ensuring you don't end up with soggy bread and half melted cheese. The perfect Panini has a crispy bread exterior and a perfectly gooey, melty interior. Second, a Panini grill is practically goof-proof. Ever flip a grilled cheese sandwich in a frying pan, only to end up losing part of your sandwich ingredients, or flip it right out of the pan? Yeah, us either. A Panini grill lets you make the perfect toasted sandwich- no flipping required.
A quality Panini grill can be a great investment for your kitchen; Most of them can do double duty as a small grill for chicken breasts or small cuts of meat as well as vegetables. It's not the same as grilling outside, but in a pinch it works just fine.
So, here are some recipes and pictures of Paninis we've made recently:

BLT Paninis
slices of pre-cooked bacon
sliced tomatoes
romaine lettuce leaves
mayonnaise
avocado
THE bread
cheddar cheese
Layer ingredients on THE bread (we recommend getting an extremely ripe avocado and spreading it on the bread instead of attempting to use slices. they're slippery.) and grill until the bread is a dark brown and the ingredients are warmed.


Pizza Paninis
Pizza sauce
Shredded mozzarella cheese
Turkey pepperoni
(additional toppings like black olives, fresh green peppers or spinach would also be delicious additions. We also added some giardiniera because we like spice)
THE bread
Spread a thin layer of pizza sauce on THE bread, add additional toppings. Grill until cheese is melted and bread is a dark brown.


Cheese and Fig Paninis
Brie, Goat or any other soft cheese that melts well
Fig preserves
THE bread
Spread a thin layer of fig preserves on THE bread. Add cheese. Grill until cheese is melted and bread is a dark brown.


Does all this talk of Paninis have you craving a sandwich of your own? Here are some links for Panini grills we recommend:
http://www.amazon.com/Cuisinart-GR-1-Griddler-Panini-Sandwich/dp/B000CPZXGO/ref=sr_1_9?ie=UTF8&qid=1395962329&sr=8-9&keywords=panini+press
This is one the Wisconsin Test Kichen has. We love it.
http://www.amazon.com/Hamilton-Beach-25460-Gourmet-Sandwich/dp/B005KKWR9C/ref=sr_1_1?ie=UTF8&qid=1395962329&sr=8-1&keywords=panini+press
Don't want to make the investment in a Panini grill? Here's another alternative:
http://www.amazon.com/Lodge-LGP3-Pre-Seasoned-Rectangular-Cast-Iron/dp/B00063RXNI/ref=sr_1_8?ie=UTF8&qid=1395962462&sr=8-8&keywords=panini+press
We'd love to hear from you- what are some of your favorite traditional, and otherwise sandwich ingredients?
Stay Cool,
The Cool Dads Crew
Yeah, us either.
Just kidding. This happens more often than we'd care to admit in the Wisconsin Test Kitchen. Some nights it just seems easier to order a pizza or some sesame chicken and call it a meal. But a few weeks ago, we discovered something glorious. Paninis are Sawyer's newest favorite food. Come to find out, she'll eat just about anything if we grill it between two slices of bread. Paninis have been an excellent way for us to get protein (nitrate free lunch meat and cheese) and vegetables (ripe avocado, peppers, lettuce) into her diet quasi-sneakily.
Paninis are also an easy meal to throw together when we find a random assortment of food in the fridge and half a loaf of THE bread. This past week we had romaine lettuce, tomatoes, avocado and leftover bacon. Bam- grilled BLTs. We've also made Pizza Paninis (pizza sauce, mozzarella cheese and turkey pepperoni), and a savory adult Panini made with crumbly goat cheese and fig spread. We've also been known to grill up a Fat Elvis Panini: peanut butter, banana slices and bacon. Mmm.
This begs the question- why is a Panini so much better than a plain old grilled cheese out of a frying pan? First, a Panini press is weighted; so it presses down your sandwich which helps to evenly grill the bread- ensuring you don't end up with soggy bread and half melted cheese. The perfect Panini has a crispy bread exterior and a perfectly gooey, melty interior. Second, a Panini grill is practically goof-proof. Ever flip a grilled cheese sandwich in a frying pan, only to end up losing part of your sandwich ingredients, or flip it right out of the pan? Yeah, us either. A Panini grill lets you make the perfect toasted sandwich- no flipping required.
A quality Panini grill can be a great investment for your kitchen; Most of them can do double duty as a small grill for chicken breasts or small cuts of meat as well as vegetables. It's not the same as grilling outside, but in a pinch it works just fine.
So, here are some recipes and pictures of Paninis we've made recently:
slices of pre-cooked bacon
sliced tomatoes
romaine lettuce leaves
mayonnaise
avocado
THE bread
cheddar cheese
Layer ingredients on THE bread (we recommend getting an extremely ripe avocado and spreading it on the bread instead of attempting to use slices. they're slippery.) and grill until the bread is a dark brown and the ingredients are warmed.
Pizza Paninis
Pizza sauce
Shredded mozzarella cheese
Turkey pepperoni
(additional toppings like black olives, fresh green peppers or spinach would also be delicious additions. We also added some giardiniera because we like spice)
THE bread
Spread a thin layer of pizza sauce on THE bread, add additional toppings. Grill until cheese is melted and bread is a dark brown.
Cheese and Fig Paninis
Brie, Goat or any other soft cheese that melts well
Fig preserves
THE bread
Spread a thin layer of fig preserves on THE bread. Add cheese. Grill until cheese is melted and bread is a dark brown.
Does all this talk of Paninis have you craving a sandwich of your own? Here are some links for Panini grills we recommend:
http://www.amazon.com/Cuisinart-GR-1-Griddler-Panini-Sandwich/dp/B000CPZXGO/ref=sr_1_9?ie=UTF8&qid=1395962329&sr=8-9&keywords=panini+press
This is one the Wisconsin Test Kichen has. We love it.
http://www.amazon.com/Hamilton-Beach-25460-Gourmet-Sandwich/dp/B005KKWR9C/ref=sr_1_1?ie=UTF8&qid=1395962329&sr=8-1&keywords=panini+press
Don't want to make the investment in a Panini grill? Here's another alternative:
http://www.amazon.com/Lodge-LGP3-Pre-Seasoned-Rectangular-Cast-Iron/dp/B00063RXNI/ref=sr_1_8?ie=UTF8&qid=1395962462&sr=8-8&keywords=panini+press
We'd love to hear from you- what are some of your favorite traditional, and otherwise sandwich ingredients?
Stay Cool,
The Cool Dads Crew
Monday, March 24, 2014
Monday Meals: Carnitas
Happy spring! Oh, wait... half of the Cool Dads Bloggers live in Wisconsin; where today the current temperature is below freezing. Whomp whomp. We've been cooking A LOT of food to compensate for the fact spring still hasn't showed up. This past weekend we made carnitas; which is Spanish for "tasty little pieces of meat that get crispy on the outside, but nice and tender on the inside- cooked in a tasty citrus marinade". We've got mad lingual skills here; let me tell you.
But seriously. We found this carnitas recipe last year and fell in love almost instantly. It's another one of those great recipes that tastes like you put a lot of effort into it... and you really didn't. If you can cut an onion, squeeze an orange and put ingredients in a Dutch oven, than you too can make (and devour) carnitas.
Pork Carnitas(recipe adapted from Cooks Illustrated)
4 pound boneless pork butt, fat trimmed and cut into 2 inch cubes
1 1/2 tsp salt
3/4 tsp pepper
1 tsp ground cumin
1 onion, peeled and halved
2 bay leaves
1 tsp dried oregano
2 Tb fresh lime juice
2 C water
1 medium orange, juiced and keep the spent halves
Adjust oven rack to lower middle position and heat to 300 degrees. Combine all the ingredients in a large Dutch oven, including the spent orange halves and juice.

Bring the mixture to a simmer over medium-high heat, uncovered. Once it simmers, cover pot and transfer it to the oven. Cook until the meat falls apart when prodded with a fork, about 2 hours.
Remove the pot from the oven and turn on the broiler. Use a slotted spoon to remove the meat from the pan and place it on a large foil-lined jelly roll pan. Remove and discard everything from the pot except for the cooking liquid. Place pot over high heat on the stove and boil until thick and syrupy, about 20 minutes. You should have about 1 C of liquid remaining when it is finished.
While the liquid is reducing, use two forks to pull each cube of pork into three equal sized pieces.

Once the liquid has become a syrup, gently fold in the pieces of pork into the pot. Try not to break up the pork any further. Taste and add additional salt and pepper.

Spread the pork back onto the foil lined pan and evenly spread the meat around so there is a single layer of meat. Place the jelly roll pan on the lower middle rack of the oven and broil until the top of the meat is well browned and edges are slightly crisp, about 5 to 8 minutes. Using a wide metal spatula, flip the pieces of meat and broil the other side until well browned and edges are slightly crisp, 5 to 8 minutes. Serve immediately in a tortilla with all your favorite toppings.


We served the carnitas along with a delicious black bean recipe we found:
http://www.skinnytaste.com/2011/01/quick-and-deliciouso-cuban-style-black.html
It was a meal all three of us loved; and we had to stop ourselves from eating the remainder of the leftovers we had promised our Nanny. We hope you enjoy it as much as we did!
Stay Cool,
The Cool Dads Crew
But seriously. We found this carnitas recipe last year and fell in love almost instantly. It's another one of those great recipes that tastes like you put a lot of effort into it... and you really didn't. If you can cut an onion, squeeze an orange and put ingredients in a Dutch oven, than you too can make (and devour) carnitas.
Pork Carnitas(recipe adapted from Cooks Illustrated)
4 pound boneless pork butt, fat trimmed and cut into 2 inch cubes
1 1/2 tsp salt
3/4 tsp pepper
1 tsp ground cumin
1 onion, peeled and halved
2 bay leaves
1 tsp dried oregano
2 Tb fresh lime juice
2 C water
1 medium orange, juiced and keep the spent halves
Adjust oven rack to lower middle position and heat to 300 degrees. Combine all the ingredients in a large Dutch oven, including the spent orange halves and juice.
Bring the mixture to a simmer over medium-high heat, uncovered. Once it simmers, cover pot and transfer it to the oven. Cook until the meat falls apart when prodded with a fork, about 2 hours.
Remove the pot from the oven and turn on the broiler. Use a slotted spoon to remove the meat from the pan and place it on a large foil-lined jelly roll pan. Remove and discard everything from the pot except for the cooking liquid. Place pot over high heat on the stove and boil until thick and syrupy, about 20 minutes. You should have about 1 C of liquid remaining when it is finished.
While the liquid is reducing, use two forks to pull each cube of pork into three equal sized pieces.
Once the liquid has become a syrup, gently fold in the pieces of pork into the pot. Try not to break up the pork any further. Taste and add additional salt and pepper.
Spread the pork back onto the foil lined pan and evenly spread the meat around so there is a single layer of meat. Place the jelly roll pan on the lower middle rack of the oven and broil until the top of the meat is well browned and edges are slightly crisp, about 5 to 8 minutes. Using a wide metal spatula, flip the pieces of meat and broil the other side until well browned and edges are slightly crisp, 5 to 8 minutes. Serve immediately in a tortilla with all your favorite toppings.
We served the carnitas along with a delicious black bean recipe we found:
http://www.skinnytaste.com/2011/01/quick-and-deliciouso-cuban-style-black.html
It was a meal all three of us loved; and we had to stop ourselves from eating the remainder of the leftovers we had promised our Nanny. We hope you enjoy it as much as we did!
Stay Cool,
The Cool Dads Crew
Sunday, March 23, 2014
Kids in the Kitchen Wednesday: M&M Cookies
Few foods remind a person of their childhood quite like M&M cookies. The Wisconsin Test Kitchen recently found a recipe for "The Perfect M&M Cookies' and decided to give it a try. The blogger claimed that vanilla pudding was crucial to the perfect cookie. We had to give it a try.
Perfect M&M Cookies
Recipe courtesy of www.picky-palate.com
1 stick/1/2 cup unsalted butter, softened
1/2 cup granulated sugar
1/2 cup packed light brown sugar
1 large egg
1/2 teaspoon pure vanilla extract
1-1/2 cups all purpose flour
3 tablespoons Instant vanilla pudding
1/2 teaspoon baking soda
1/2 teaspoon kosher salt
3/4 cup mini chocolate chips
1 cup mini M&Ms candies


Perfect M&M Cookies
Recipe courtesy of www.picky-palate.com
Preheat oven to 350 degrees and line a large cookie sheet with parchment paper or a silpat liner (this keeps the cookies from sticking to the cookie sheet).
In a large mixing bowl, cream your butter and sugars until well combined. Add your egg and vanilla mixing to combine. Add your flour, pudding mix, baking soda and salt, stirring until all ingredients are incorporated. Add chocolate chips and M&M's and combine.
With a medium cookie scoop, place dough 1 inch apart from each other.
Bake for 10-12 minutes until cooked through. Let cool on cookie sheet for 10 minutes before transferring to a cooling rack.
Makes 2 dozen cookies
The verdict? These cookies were pretty delicious. We used kosher salt, which gave the cookies that perfect sweet/salty combination. While we're unsure what the addition of vanilla pudding did; we'll just say it made the cookies even tastier. You can't really argue with that.
This very well might be our new go-to cookie recipe. We hope you enjoy it as much as we did.
Stay Cool,
The Cool Dads Crew
The Cool Dads Crew
Thursday, March 20, 2014
Friday FUNdamentals: THE Bread
Every once in a while a recipe comes along that's so magical... so delicious... it immediately becomes part of your weekly rotation. Folks, I'd like to introduce you to THE bread.
A few summers ago, we were spending $5.00 on a loaf of crusty, artisanal bread every time we'd go to the farmers market. $5.00 for flour, water and yeast. That's a rip off. So we strived to make it ourselves, and we were pretty darn successful. It helped that we found a recipe on Pinterest that was almost fool proof.
So why do we call it THE bread? Every time the Wisconsin Test Kitchen offered to bring bread to a family meal; people would ask if it was THE bread... "You know, that really good bread that's soft on the inside and really crunchy on the outside?"
That's the beautiful thing about this bread- it's deceptively easy to make; and the end result is really, really delicious. We've given out this recipe more times than we can count. And now we'll share it with you. Make a loaf of it and impress your family at dinner time tonight.
THE bread
3 cups unbleached all purpose
flour
1 3/4 teaspoons
salt
1/2 teaspoon Instant or Rapid-rise
yeast
1 1/2 cups
water
In a large mixing bowl, whisk
together flour, salt and yeast.
Add water and mix until a shaggy mixture
forms.
Cover bowl with plastic wrap and set aside for 12 - 18 hours. Overnight
works great.
Heat oven to 450 degrees. When the oven has reached 450 degrees
place a cast iron pot with a lid in the oven and heat the pot for 30 minutes.
Meanwhile, pour dough onto a heavily floured surface and shape into a ball.
Cover with plastic wrap and let set while the pot is heating. Remove hot pot
from the oven and drop in the dough. Cover and return to oven for 30 minutes.
After 30 minutes remove the lid and bake an additional 15 minutes. Remove bread
from oven and place on a cooling rack to cool.
Recipe courtesy of www.simplysogood.com
It doesn't get any easier than that. And the results speak for themselves. THE bread is delicious with soup or chili; or even as part of a Panini (cough, cough, spoiler! Paninis are the next FUNdamental we're going to teach you to make).
We hope you start making bread as much as we do!
Stay Cool,
The Cool Dads Crew
The Cool Dads Crew
Wednesday, March 19, 2014
Kids in the Kitchen Wednesday: Granola Bars
The Wisconsin Test Kitchen just finished reading an article titled "14 Foods You Should Never Eat". It was a nice affirmation of all the organic food we eat; and the efforts we make to preserve as much food as possible during summer (hi, tomatoes!). But there are still a few bad habits we have- the occasional diet soda, the Happy Meal we buy Sawyer when we're too lazy to cook dinner or the sprouts we get on our subs.
But the main point the article made was to eat as clean as possible- and pay attention to the ingredients in your food! That being said, the Wisconsin Test Kitchen made some really tasty homemade granola bars last weekend! We promise, you'll be able to recognize all the ingredients in these tasty bites.
Apricot Oatmeal Bars
3/4 cup butter, cut up
2 teaspoons soft butter for greasing pan
1 cup firmly packed dried apricots
1.5 cups old fashioned rolled oats
1 cup all purpose flour
1 cup firmly packed dark brown sugar
1/4 teaspoon salt
1/4 teaspoon cinnamon
1.5 teaspoons vanilla extract
Put 3/4 cup butter in a small saucepan and set over medium high heat. Stir until butter is melted- about 2 minutes. Set aside to cool.
Preheat oven to 350 degrees. Line the bottom and sides of a 9"x9" baking pan with foil. Grease the foil with butter.
Using kitchen scissors, cut the apricots into 1/2" pieces.

In a mixing bowl, combine the rolled oats, flour, brown sugar, salt and cinnamon. Mix until well combined and no lumps of sugar remain.

Add the apricots, melted butter and vanilla to the bowl. Stir until well blended- the dough will be moist and crumbly. Dump the dough into the prepared baking pan and press into the pan with your fingers.


Bake until the top is golden brown- about 35-40 minutes. Remove from oven and let cool completely.


Lift the foil and the oatmeal bars from the pan and place on a cutting board. Peel away the foil from the sides and bottom of the granola bars. Using a sharp knife, cut into rectangles and store in an airtight container. Yields 18 bars.
Recipe courtesy of The Kids Cookbook- Williams Sonoma
This is a great recipe to make on the weekend, and use for school lunches throughout the week. The result is a granola bar that tastes more like a delicious fruit cobbler. This is a true kid tested recipe- the test kitchen kids (yes, there were several)- all enjoyed it. Although one kept commenting it would taste better with ice cream. So there's that.
Here's a link to the article we originally referenced; in case you're interested in reading it:
http://healthyliving.msn.com/nutrition/nourish-what-counts/slideshow?cp-documentid=250218929
Stay Cool,
The Cool Dads Crew
But the main point the article made was to eat as clean as possible- and pay attention to the ingredients in your food! That being said, the Wisconsin Test Kitchen made some really tasty homemade granola bars last weekend! We promise, you'll be able to recognize all the ingredients in these tasty bites.
Apricot Oatmeal Bars
3/4 cup butter, cut up
2 teaspoons soft butter for greasing pan
1 cup firmly packed dried apricots
1.5 cups old fashioned rolled oats
1 cup all purpose flour
1 cup firmly packed dark brown sugar
1/4 teaspoon salt
1/4 teaspoon cinnamon
1.5 teaspoons vanilla extract
Put 3/4 cup butter in a small saucepan and set over medium high heat. Stir until butter is melted- about 2 minutes. Set aside to cool.
Preheat oven to 350 degrees. Line the bottom and sides of a 9"x9" baking pan with foil. Grease the foil with butter.
Using kitchen scissors, cut the apricots into 1/2" pieces.
In a mixing bowl, combine the rolled oats, flour, brown sugar, salt and cinnamon. Mix until well combined and no lumps of sugar remain.
Add the apricots, melted butter and vanilla to the bowl. Stir until well blended- the dough will be moist and crumbly. Dump the dough into the prepared baking pan and press into the pan with your fingers.
Bake until the top is golden brown- about 35-40 minutes. Remove from oven and let cool completely.
Lift the foil and the oatmeal bars from the pan and place on a cutting board. Peel away the foil from the sides and bottom of the granola bars. Using a sharp knife, cut into rectangles and store in an airtight container. Yields 18 bars.
Recipe courtesy of The Kids Cookbook- Williams Sonoma
This is a great recipe to make on the weekend, and use for school lunches throughout the week. The result is a granola bar that tastes more like a delicious fruit cobbler. This is a true kid tested recipe- the test kitchen kids (yes, there were several)- all enjoyed it. Although one kept commenting it would taste better with ice cream. So there's that.
Here's a link to the article we originally referenced; in case you're interested in reading it:
http://healthyliving.msn.com/nutrition/nourish-what-counts/slideshow?cp-documentid=250218929
Stay Cool,
The Cool Dads Crew
Sunday, March 16, 2014
Monday Meals: Corned Beef Two Ways
"Why is corned beef so good? And why do we only eat it once a year?"
There was a lot of this in the Wisconsin Test Kitchen this weekend. And since a bout of strep throat cancelled all our weekend plans; we decided to spend the weekend at home, eating as much corned beef as possible.
Saturday night we made homemade Reuben sandwiches, thanks to the recipe below:
http://theframedtable.com/2013/04/reuben-sandwich/
The result? So delicious. We can't recommend making your own dressing enough. It added a nice tangy, creamy element to the sandwiches that store bought Thousand Island dressing can't even touch. Just do it. You'll thank us later.
When it came to grilling the sandwiches, we made ours on a Panini grill- which made the rye bread nice and crispy and the inside all melty. Mmm. If you're making these for a group, we recommend grilling them on a large griddle, instead of making them one at a time in a frying pan.
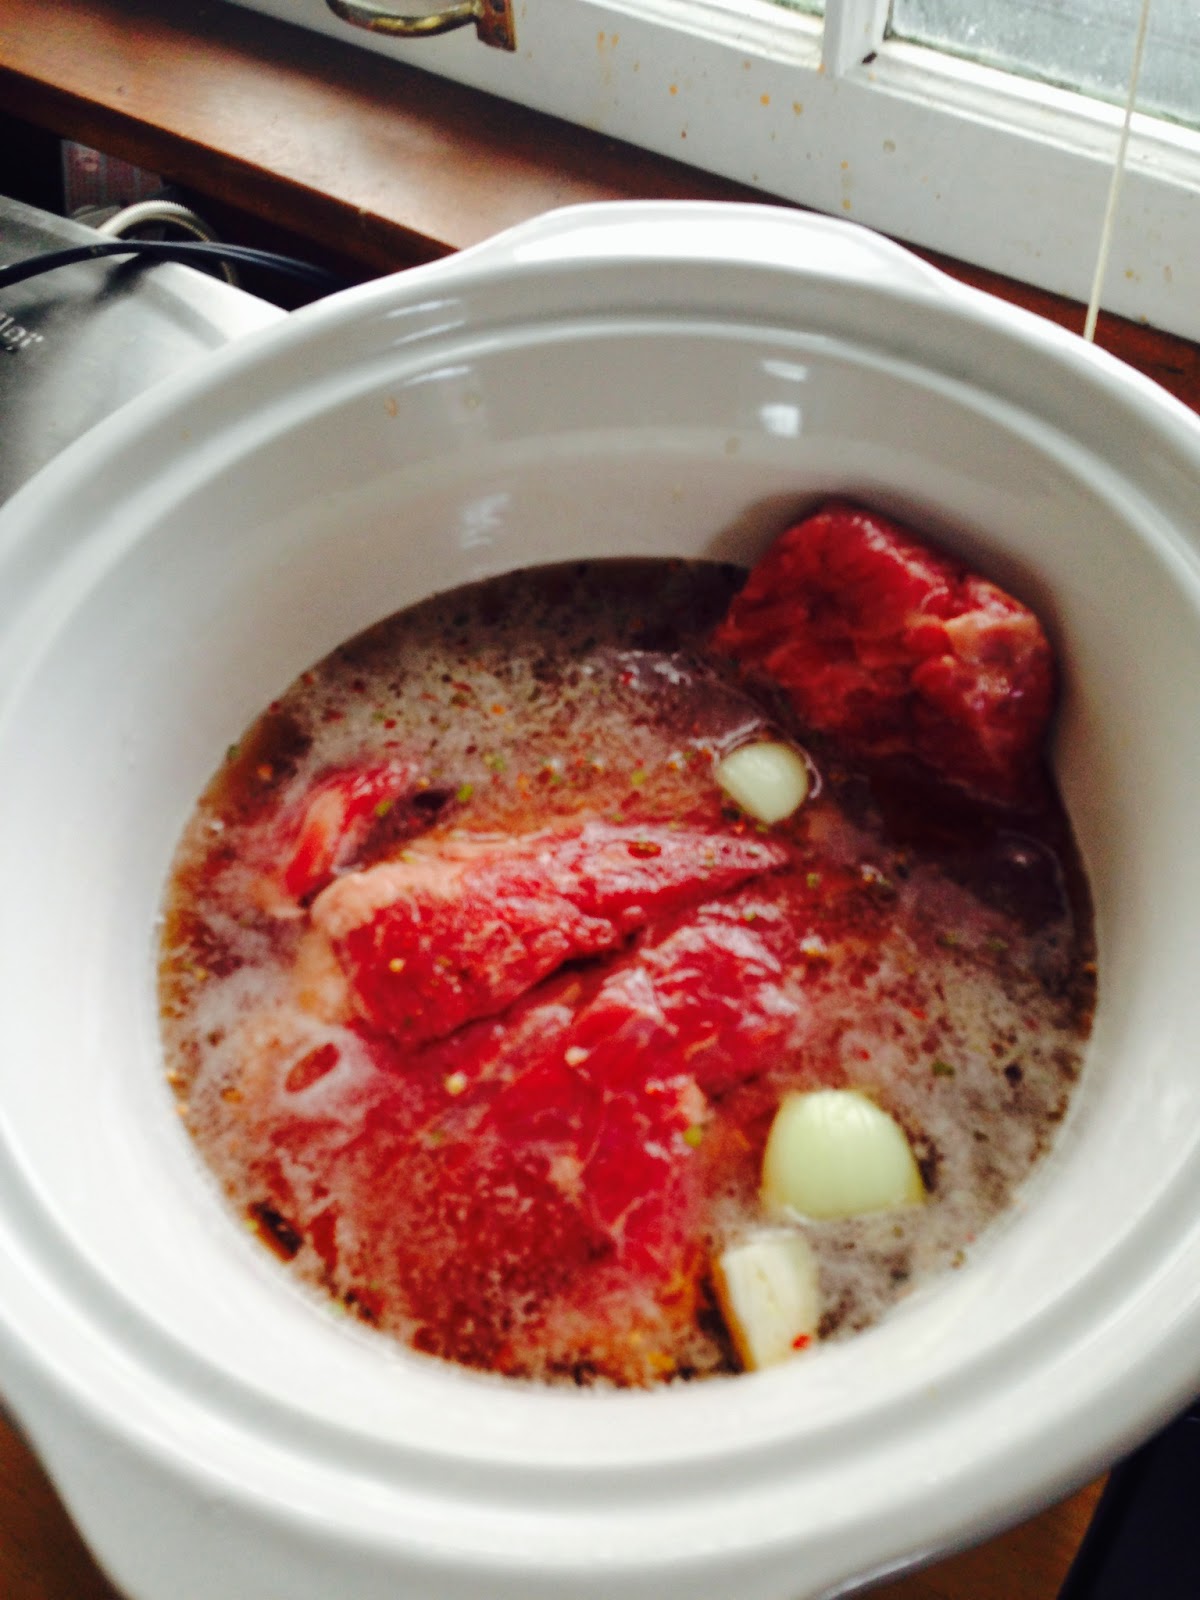
Sunday it was time for traditional corned beef and cabbage. We've been using the same recipe for the past few years; and the results are great. The recipe bills itself as "goof-proof" and we have to agree. If you can add a bunch of things into a crock pot; than you can make corned beef and cabbage.
Cool Dads Corned Beef & Cabbage


 4. Set crockpot, cover and cook on LOW for 8 hours.
5. After 4 hours of cooking, add in potatoes and carrots. Cover and continue cooking.

6. When 1 hour remains, add cabbage to the crockpot. Cover and continue cooking for the remainder of the time.

There you have it: corned beef and cabbage- simplified.
Recipe courtesy of www.familyfreshmeals.com
A note on buying corned beef: you have two options when it comes to briskets: the flats and the points. Flats are better for sandwiches- they slice easier; whereas the points are fattier, and perfect for stews and boiled dinners. The Wisconsin Test Kitchen got a TON of questions about this at the grocery store on Saturday.
Hope you have a lovely, safe St. Patrick's Day, full of delicious food!
Stay Cool,
The Cool Dads Crew
There was a lot of this in the Wisconsin Test Kitchen this weekend. And since a bout of strep throat cancelled all our weekend plans; we decided to spend the weekend at home, eating as much corned beef as possible.
Saturday night we made homemade Reuben sandwiches, thanks to the recipe below:
http://theframedtable.com/2013/04/reuben-sandwich/
The result? So delicious. We can't recommend making your own dressing enough. It added a nice tangy, creamy element to the sandwiches that store bought Thousand Island dressing can't even touch. Just do it. You'll thank us later.
When it came to grilling the sandwiches, we made ours on a Panini grill- which made the rye bread nice and crispy and the inside all melty. Mmm. If you're making these for a group, we recommend grilling them on a large griddle, instead of making them one at a time in a frying pan.
Sunday it was time for traditional corned beef and cabbage. We've been using the same recipe for the past few years; and the results are great. The recipe bills itself as "goof-proof" and we have to agree. If you can add a bunch of things into a crock pot; than you can make corned beef and cabbage.
Cool Dads Corned Beef & Cabbage
Ingredients (in order of use)
5-6 garlic cloves
1 small onion, cut into wedges
3 cups of water
2 TBSP sugar
2 TBSP apple cider vinegar
12 oz beer (we used Killian's Irish Red)
4 lbs corned beef brisket
1lb. of carrots
1 lb small red potatoes, quartered
1 head of green cabbage, cut into wedges
—-seasoning packet ingredients—–
{leave this out if you are using the packet that comes with the meat.}
1/2 tsp mustard seeds
2 bay leaves, crushed
8 Allspice berries
1/2 tsp salt
1/2 tsp pepper
1. First place onion wedges and garlic at the bottom of your crockpot. This is going to act as a stand for your meat, so it doesn’t touch the bottom and dry out. Place beef on top of onions and garlic.
2. Next, mix together water, beer, sugar and vinegar.
3. Pour over beef and then sprinkle seasoning packet over meat. If you are using the homemade corned beef seasoning recipe, simply mix together the mustard seeds, bay leaves, allspice berries, salt and pepper and sprinkle on top of beef.
5. After 4 hours of cooking, add in potatoes and carrots. Cover and continue cooking.
6. When 1 hour remains, add cabbage to the crockpot. Cover and continue cooking for the remainder of the time.
There you have it: corned beef and cabbage- simplified.
Recipe courtesy of www.familyfreshmeals.com
A note on buying corned beef: you have two options when it comes to briskets: the flats and the points. Flats are better for sandwiches- they slice easier; whereas the points are fattier, and perfect for stews and boiled dinners. The Wisconsin Test Kitchen got a TON of questions about this at the grocery store on Saturday.
Hope you have a lovely, safe St. Patrick's Day, full of delicious food!
Stay Cool,
The Cool Dads Crew
Wednesday, March 12, 2014
Kids in the Kitchen Wednesday: Ice Cream Cone Cupcakes
This recipe is a little bit of nostalgia; any kid that remembers growing up in the 80's and 90's remembers this being a "fancy" dessert. I don't know about you, but I was always curious how my mom got that cupcake inside the ice cream cone. Well, mystery solved. And it's time to pass this recipe onto a new generation of cooks and cupcake lovers alike.
One of the great things about this recipe is that it's customizable. St Patrick's Day is coming up, and it would be the perfect time to make green cake and frosting. For the little princess in your life- pink and pink would be the way to go. I was making this recipe with some total choco-holics, so we went with chocolate on chocolate. Still delicious.
Ice Cream Cone Cupcakes
12-18 flat bottom ice cream cones
1 cake mix of your choosing
Ingredients to complete the cake mix of your choosing (eggs, oil, water, etc)
Frosting of your choosing
Pre-heat oven to 325 degrees. Place ice cream cones on a rimmed cookie sheet.

Prepare cake mix according to package directions.

Fill ice cream cones with 3 tablespoons of cake batter (approx. 1/4 cup).

Bake for 15-20 minutes, or until cupcakes are done cooking. Easy way to tell: the tops spring back when you touch them lightly.

Remove from the oven and allow to cool completely before frosting and topping with sprinkles.
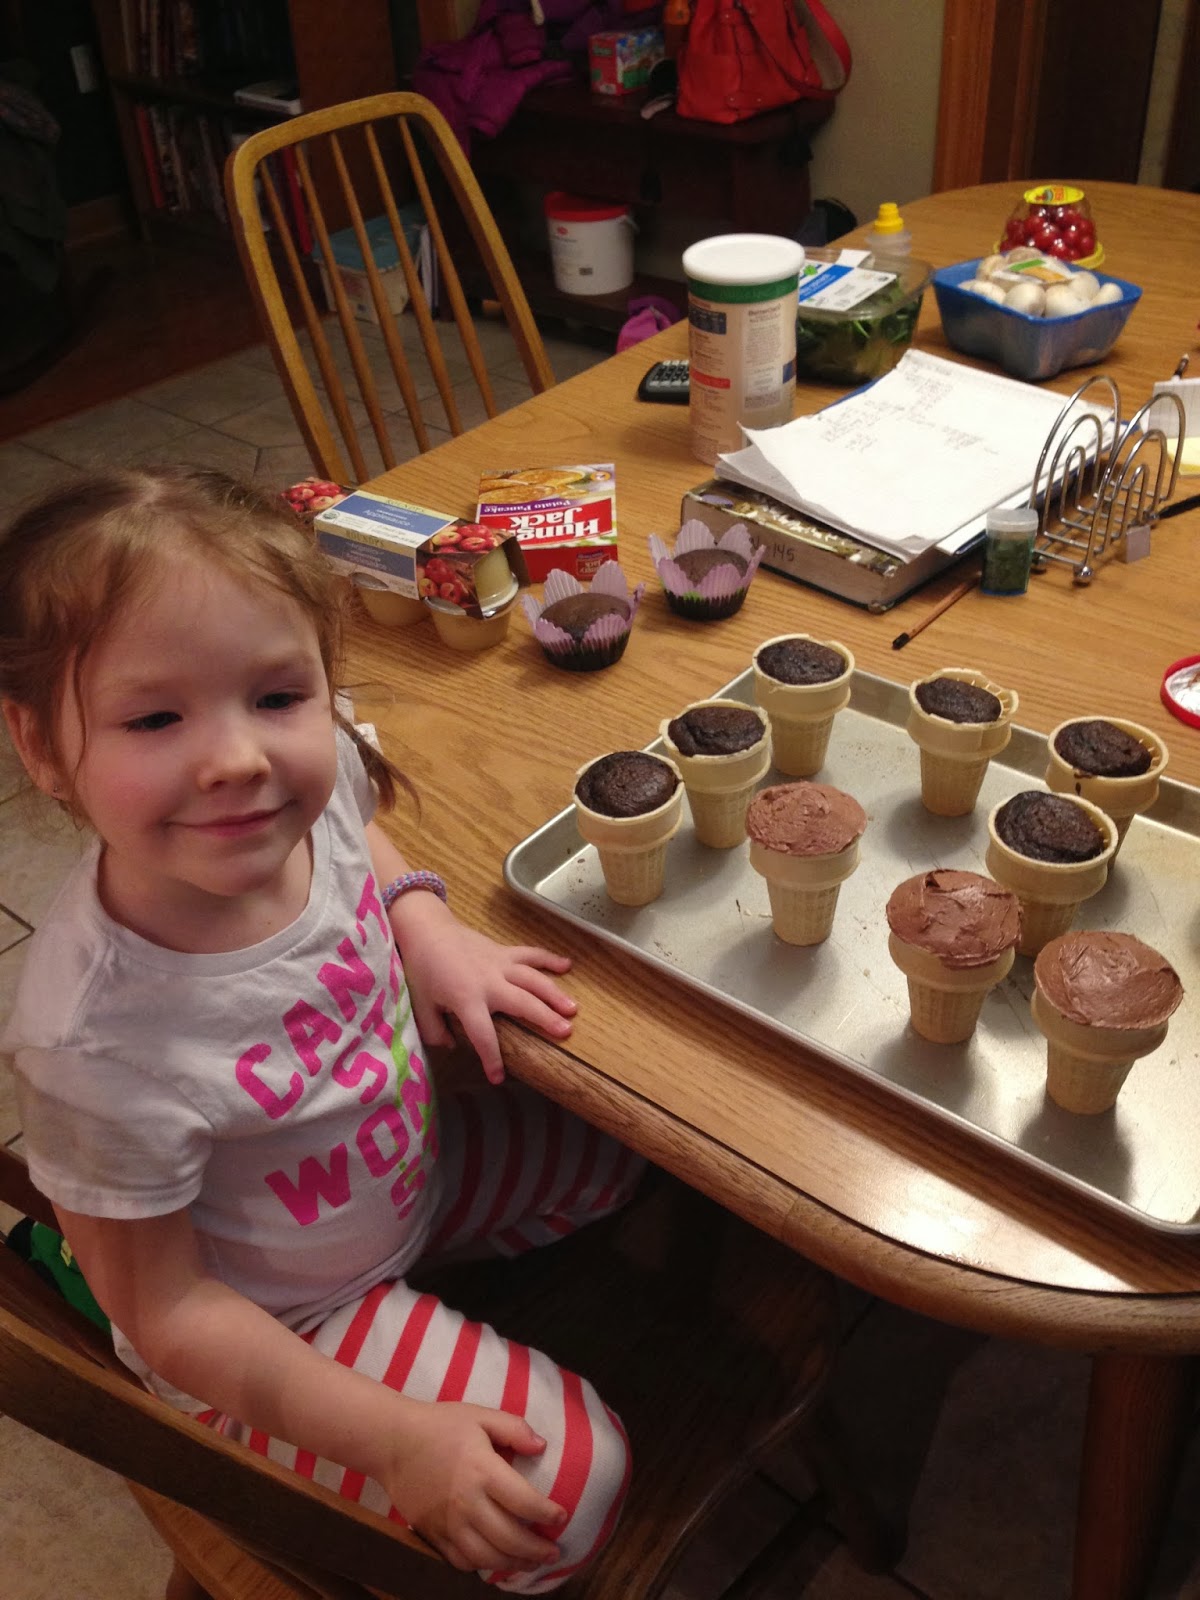


Needless to say, this was a really fun recipe the Wisconsin Test Kitchen enjoyed making (and eating). Anything that gets your little ones in the kitchen for some quality time is always a great thing!
Stay Cool,
The Cool Dads Crew
One of the great things about this recipe is that it's customizable. St Patrick's Day is coming up, and it would be the perfect time to make green cake and frosting. For the little princess in your life- pink and pink would be the way to go. I was making this recipe with some total choco-holics, so we went with chocolate on chocolate. Still delicious.
Ice Cream Cone Cupcakes
12-18 flat bottom ice cream cones
1 cake mix of your choosing
Ingredients to complete the cake mix of your choosing (eggs, oil, water, etc)
Frosting of your choosing
Pre-heat oven to 325 degrees. Place ice cream cones on a rimmed cookie sheet.
Prepare cake mix according to package directions.
Fill ice cream cones with 3 tablespoons of cake batter (approx. 1/4 cup).
Bake for 15-20 minutes, or until cupcakes are done cooking. Easy way to tell: the tops spring back when you touch them lightly.
Remove from the oven and allow to cool completely before frosting and topping with sprinkles.
Needless to say, this was a really fun recipe the Wisconsin Test Kitchen enjoyed making (and eating). Anything that gets your little ones in the kitchen for some quality time is always a great thing!
Stay Cool,
The Cool Dads Crew
Monday, March 10, 2014
Monday Meals: Southwestern Spaghetti Squash Casserole
It's been a while since we've done a blog for our vegetarian/vegan followers- so here you go! The Wisconsin Test Kitchen has been making a lot of recipes lately with spaghetti squash. It's a great substitute for pasta (don't get us wrong; we love pasta- this is just a healthier alternative, and a great way to get vegetables into our diet) and it's delicious. The smallest member of our test kitchen also loves it- which is an added bonus.
We've made this recipe a few times; and it continues to be one of our favorite preparations. The jalapeno adds a nice level of heat, the cheese makes it feel indulgent... the recipe just works on a lot of levels. Also, we're able to customize it to the tastes of our little one. She prefers her spaghetti squash mixed with black beans and red pepper, with a little mozzarella cheese melted on top. We take some of the spaghetti squash, mix it with the above ingredients, top it with cheese and microwave it for a few seconds to get the cheese to melt. Easiest (and healthiest) dinner ever.
Ingredients
1 spaghetti squash
2 Tbs. extra-virgin olive oil
1/2 red onion, chopped
3 garlic cloves, minced
1 jalapeno pepper, minced (leave seeds in for more heat)
1 red bell pepper, chopped
1 Tbs. ground cumin
1 Tbs. Mexican oregano
1 Tbs. chili powder
1 can black beans (drained and rinsed)
1 cup frozen corn, thawed
coarse salt and freshly ground pepper
1/2 cup freshly torn cilantro, plus more for garnish
1 lime
1 cup grated cheddar cheese
Preheat oven to 375.
Roast squash on a baking sheet for 50 minutes. Let cool, then cut in half. Spoon out the seeds, then using a fork, scrape up the flesh, making the “spaghetti.”


Heat oil in a medium skillet. Add the onion, garlic, jalapeno pepper and red bell pepper. Sautee for 2 minutes. Add cumin, Mexican oregano, chili powder and a good pinch of salt and pepper. Sautee for another minute. Add the beans, corn and cilantro. Stir to combine. Squeeze in the lime juice and give one last stir.

Add the “spaghetti” to the bean mixture and stir to combine. Taste and season accordingly.
Switch oven to broil.
Stuff each squash half with the mixture and top with grated cheese.
Stick it back under the broiler until the cheese melts and gets all brown and bubbly.


Garnish with a little bit of cilantro and serve.
Recipe courtesy of www.bevcooks.com
Notes from the Test Kitchen
-While it's cute to stuff the spaghetti squash mixture back into the squash shells; it's just as easy to prepare the meal in a Dutch oven or oven proof dish, and pop it into the oven and broil it that way. The choice is entirely yours.
-Upon further inspection, we realized our tiny chef was really onto something; the recipe tasted better topped with mozzarella cheese instead of cheddar. Of course vegans will want to skip this step all together; but the cheese does add a little something extra... like cheese tends to do.
We know spaghetti squash looks daunting; but it's easy to prepare and it's a great, healthy meal for your family. We hope you enjoy this one as much as we do!
Stay Cool,
The Cool Dads Crew
We've made this recipe a few times; and it continues to be one of our favorite preparations. The jalapeno adds a nice level of heat, the cheese makes it feel indulgent... the recipe just works on a lot of levels. Also, we're able to customize it to the tastes of our little one. She prefers her spaghetti squash mixed with black beans and red pepper, with a little mozzarella cheese melted on top. We take some of the spaghetti squash, mix it with the above ingredients, top it with cheese and microwave it for a few seconds to get the cheese to melt. Easiest (and healthiest) dinner ever.
Ingredients
1 spaghetti squash
2 Tbs. extra-virgin olive oil
1/2 red onion, chopped
3 garlic cloves, minced
1 jalapeno pepper, minced (leave seeds in for more heat)
1 red bell pepper, chopped
1 Tbs. ground cumin
1 Tbs. Mexican oregano
1 Tbs. chili powder
1 can black beans (drained and rinsed)
1 cup frozen corn, thawed
coarse salt and freshly ground pepper
1/2 cup freshly torn cilantro, plus more for garnish
1 lime
1 cup grated cheddar cheese
Preheat oven to 375.
Roast squash on a baking sheet for 50 minutes. Let cool, then cut in half. Spoon out the seeds, then using a fork, scrape up the flesh, making the “spaghetti.”
Heat oil in a medium skillet. Add the onion, garlic, jalapeno pepper and red bell pepper. Sautee for 2 minutes. Add cumin, Mexican oregano, chili powder and a good pinch of salt and pepper. Sautee for another minute. Add the beans, corn and cilantro. Stir to combine. Squeeze in the lime juice and give one last stir.
Add the “spaghetti” to the bean mixture and stir to combine. Taste and season accordingly.
Switch oven to broil.
Stuff each squash half with the mixture and top with grated cheese.
Stick it back under the broiler until the cheese melts and gets all brown and bubbly.
Garnish with a little bit of cilantro and serve.
Recipe courtesy of www.bevcooks.com
Notes from the Test Kitchen
-While it's cute to stuff the spaghetti squash mixture back into the squash shells; it's just as easy to prepare the meal in a Dutch oven or oven proof dish, and pop it into the oven and broil it that way. The choice is entirely yours.
-Upon further inspection, we realized our tiny chef was really onto something; the recipe tasted better topped with mozzarella cheese instead of cheddar. Of course vegans will want to skip this step all together; but the cheese does add a little something extra... like cheese tends to do.
We know spaghetti squash looks daunting; but it's easy to prepare and it's a great, healthy meal for your family. We hope you enjoy this one as much as we do!
Stay Cool,
The Cool Dads Crew
Subscribe to:
Posts (Atom)